Friday, May 27, 2022

Stampin Friends May 2022 Blog Hop - Celebrating Men!


Welcome to Stampin Friends Blog Hop! This month we are celebrating men which is just fitting because next month we celebrate Father's Day here in the states.

 If you are following along the hop, you have arrived from Steph’s blog. Be sure to read through my blog, comment below and continue to Melissa’s blog. If you get lost along the way, you can find a list of Blog Hoppers at the end of each Blog.

ENJOY! 

I know most of us have a hard to buying for the men in our lives, so we tend to give giftcards.  My project this month makes giftcard giving much more fun!

I am using the product suite "He's the Man" from Stampin' Up!  Once again they have out done their self.  The suite includes everything you need to make masculine cards and 3D projects.  Here are mine!

Greeting Card:


SUPPLIES: Early Espresso Card Stock; Crushed Curry Card Stock; He's the Man 12"x12" Specialty Designer Series Paper (DSP); Rustic Metallic Adhesive Dots

INSTRUCTIONS: Like I said Stampin' Up! really out did themselves and this time they did it by having one of their printed DSP sheets already laser cut.  There are a ton of pieces that can be used to quickly put a greeting card or scrapbook page together.

  • Card Base = 8 1/2" x 5 1/2" early espresso card stock
  • First Layer = 4" x 5 1/4" crushed curry card stock
  • Second Layer = 3 3/4" x 4 3/4" camper print DSP checked print visible; 2 pieces of 1 1/2" x 3 3/4" camper print DSP with camper print visible.
  • Lastly I did die cut the crushed curry "banner" to add to the cluster in the center of my card.  The circle piece and arrow is one of the laser cut pieces that comes in the DSP.  And yes I blinged a masculine card with rustic metalic adhesive dots.


Smores Themed Gift Card Holder:

SUPPLIES: Soft Succulent Card Stock; He's the Man 12"x12" Specialty Designer Series Paper (DSP); Cajun Crase Card Stock; Rustic Metallic Adhesive Dots, Twine

SIDE NOTE: Please ignore the "seasonal" marshmallow peeps (lol).  
 
I thought I would disguise a gift card for my 3D project.  I think getting a gift card in your greeting card or one of the provided envelopes is soooo boring!  So here is an alternative way which can be replicated for anyone in your life. It's a mini smores kit that includes the gift card in the reusable waterproof case!  Just an FYI, you can buy the water proof case at most out doors shops.
 
INSTRUCTIONS: 
  • For the case I removed the insert and used it as a template which I traced onto a piece of DSP. The piece of DSP used is approximately 6" x 4".  I then scored in the same spots as the "template" so it would slide into the case as the original insert.


  • For part of the "smores" kit, yes I used a snowman peep for the marshmallow and scooby snacks for the graham crackers (these are my favorite)!  I placed them in a cello bag and tied the top with some twine.  I then used one of the pieces from the laser cut sheet in the "He's the Man" DSP to decorate the cello bag.  
           
  • If you have the mini Hersey bars you could add them to this kit.  I only had the large bars on hand so I made a pouch to hold it. You could "hide" the giftcard in this pouch also. 
  • To make the pouch I used a piece of 5 2/2" x 6" DSP.  It is scored at 1 5/8" on either side when holding the piece of DSP landscape.  Then scored at 1/2" on one side when holding the piece of DSP portrait. Then I trimmed as shown in the image.
  • Then you just place adhesive on the tab and on the flap to close up the pouch.  You can punch a circle or die cut a shape at the top of the pouch to expose more of the chocolate bar.
  • Once again I used some of the pieces from the laser cut sheet of DSP, I die cut the banner out of soft succulent card stock and stamped the "compas" image in early espresso on the cajun craze DSP.  I then added this to the pouch with some twine.
         

 I hope you enjoyed my Celebrating Men card and 3D project!  Don’t forget, comments of any kind (well hopefully nice ones, lol) are greatly appreciated. 

When you are done here be sure to hop on over to Melissa’s Blog.         See you next month!

Blog Hop Index

__________________________________________________________________


EARLY ESPRESSO CARDSTOCK (119686 | $9.25)
EARLY ESPRESSO INK (147114 | $8.00)
CRUSHED CURRY CARDSTOCK (131199 | $9.25)
SOFT SUCCULENT CARDSTOCK (155776 | $9.25)
CAJUN CRAZE CARDSTOCK (119684 | $9.25)
HE'S ALL THAT BUNDLE (159079 | $45.00)
HE'S THE MAN SPECIALTY DSP (159068 | $15.00)
RUSTIC METALLIC ADHESIVE DOTS (159082 | $8.00)
Friday, April 22, 2022

Stampin Friends April 2022 Blog Hop - All About the Flowers!


Welcome to Stampin Friends Blog Hop! It is All about Flowers For Aprils Blog Hop!  We are getting ready here for the flower season are you?  After all, April showers bring May flowers!

 If you are following along the hop, you have arrived from Barb’s blog. Be sure to read through my blog, comment below and continue to Jo’s blog. If you get lost along the way, you can find a list of Blog Hoppers at the end of each Blog.

ENJOY!

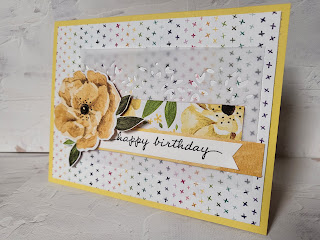
I just love this time of year....the drabby winter months are slowly going away, making the way for sunshine and mother nature waking everything up again.  The trees are filling their branches, the grass is growing and most importantly, the flowers are blooming! So, with this we decided to focus on flowers for this blog.  My projects consist of another "gift set" that can be given as a birthday gift for spring time. Of course there is a greeting card, along with a small jar of loose leaf tea. I had a really fun time putting my projects together and hope you enjoy them.

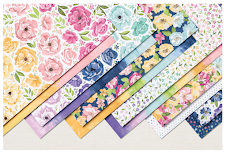
For my projects I used a very new suite that will be in the NEW Stampin' Up! catalog which should be in hands by now!  If it is not, don't worry it will be there very soon!  The suite I used is called Hues of Happiness.  I just love how Stampin' Up! makes sure some of their DSP images can be die cut out with the coordinating die set!  When you have a busy month like I did, it makes it easy to create a master piece in no time at all!


Products Used: 

  Happiness Abounds Bundle

  Hues of Happiness 12" x 12" DSP

  Daffodil Delight Card Stock

  Rustic Metallic Adhesive-Backed Dots

Simple Card Instructions:

  1. The card base is made with daffodil delight card stock.  I then layered a piece of DSP from Hues of Happiness.
  2. For my next layer, I first die cut the velum with the texture die from the Blossoming Happiness Die Set.
  3. On top pf the velum I adhered two strips of DSP (this paper is so beautiful, I wanted to show of as much of it as possible).
  4. Lastly, I stamped the sentiment in black on basic white card stock and die cut out one of the larger flowers from the DSP, along with some leaves. I added a rustic metallic adhesive-back dot to the center of the flower.

Simple Gift Instructions:

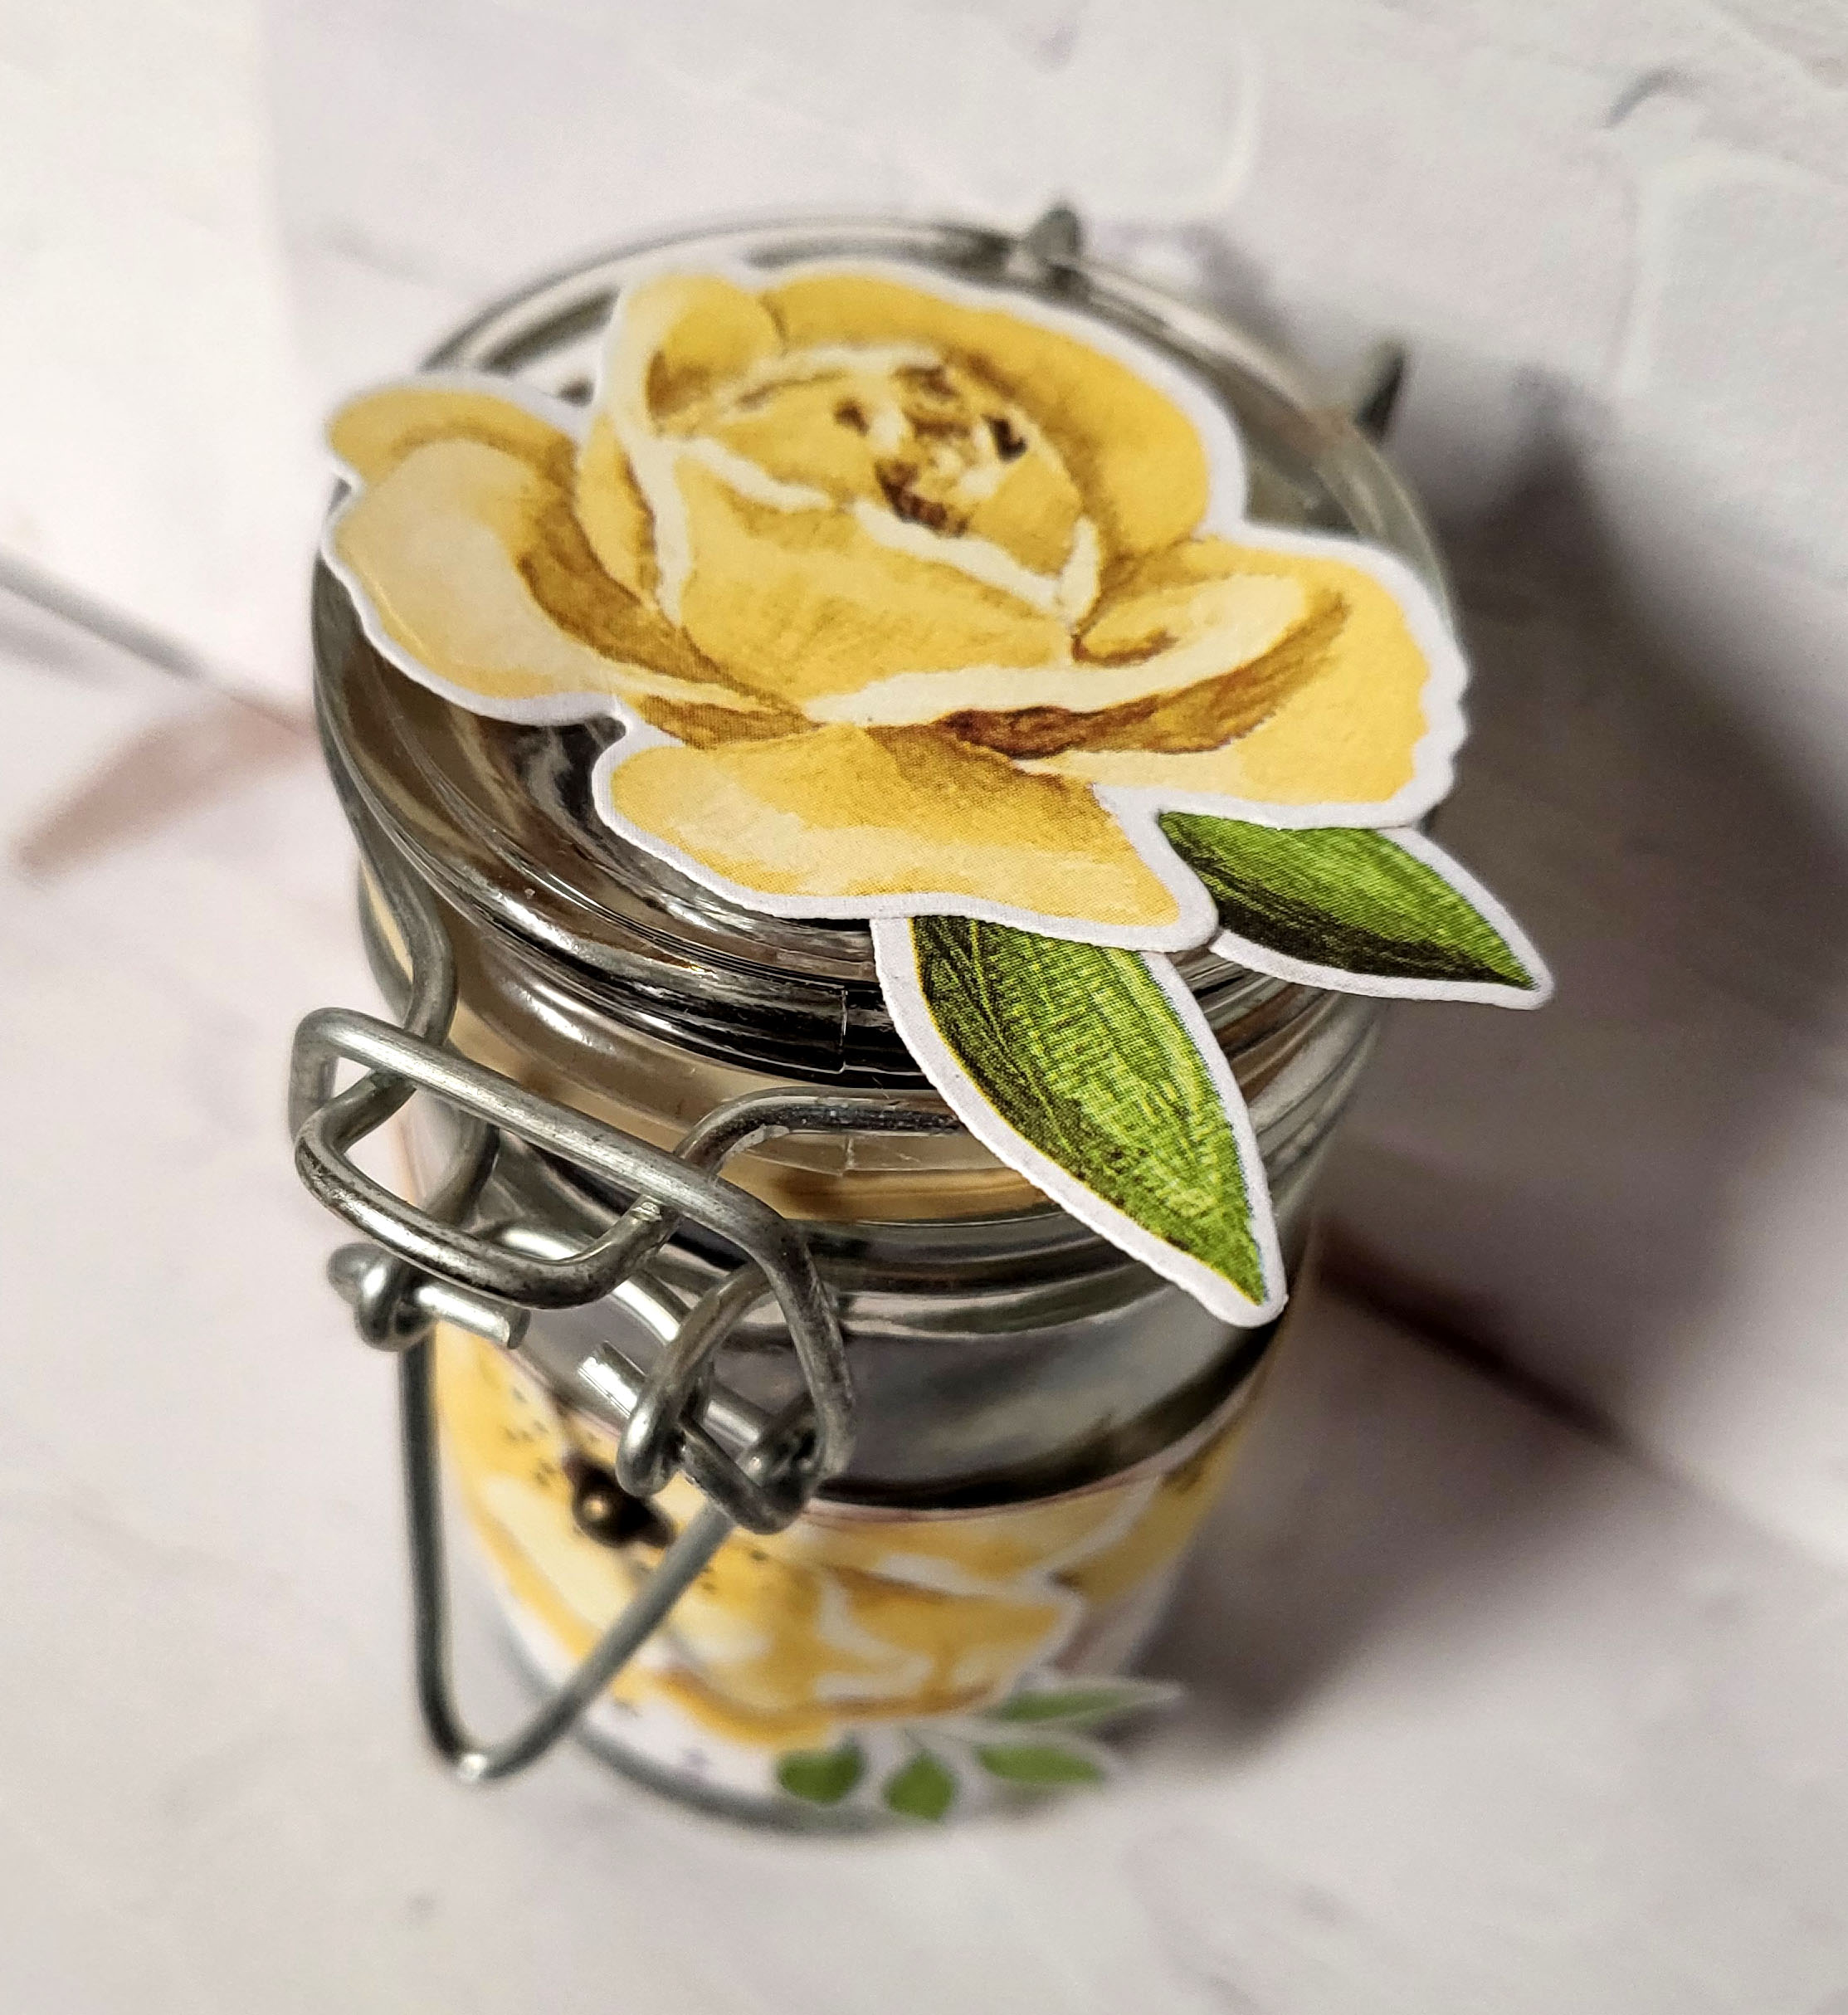
I used a simple spice jar to hold my loose leaf tea and prettied it up using more of the Hues of Happiness DSP.

  1.   The first thing I did is wrap a strip of DSP around the jar. Then I added a thin strip of daffodil delight card stock, which I die cut the top using the "note book" die from the Happiness Die Set. (Unfortunately, I just realized you can not see this in any of the pictures, but trust me it is so cute!)
  2. I added the same flower and leaves from the card to cover up the seams. 
  3. In the center of the flower I also added a rustic metallic adhesive-back dot. Just an FYI, just because the flower is cut off on the DSP, it can still be used.  The flower used here was on the edge of the DSP so no need to cut a whole flower in half to get the effect that I wanted!
  4. I then added a smaller flower from the DSP to the top of the lid, along with more leaves.


I hope you enjoyed my All About Flowers card and project!  Don’t forget, comments of any kind (well hopefully nice ones, lol) are greatly appreciated. 
When you are done here be sure to hop on over to Jo’s Blog.
See you next month!

______________________________________________________________
BASIC WHITE CARDSTOCK (159276 | $9.75)
HAPPINESS ABOUNDS BUNDLE (158824 | $49.50)
HUES OF HAPPINESS 12X12 DSP (158822 | $12.00)
RUSTIC ADHESIVE-BACK DOTS (159082 | $8.00)
VELLUM CARDSTOCK (101856 | $10.00) 


Thursday, March 31, 2022

Stampin' w/Tiziana April News 2022

Stampin w/Tiziana April 2022 News

It is really hard for me to tell you all that this year will be my last year as a Stampin’ Up! Demonstrator…I just don’t have the mojo to continue….APRIL FOOLS!!!! hahahahaha!!!!
I could never give up this side gig!!!!  I love you all too much!!!  However, it is time for some items to be retired from Stampin’ Up!’s catalog…so read on and you will see what will no longer be!

April's Hostess Code​!!
Always looking for the hostess code?? Here’s a quicker way to be sure you are using the Hostesses code all the time when you want to place an order.  Just click this link https://www.stampinup.com?hostcode=737UPKSQ and it will automatically have you shopping under me with March’s Hostess Code.
 Be sure to use this code (737UPKSQ) in April at check out if your order is less than $150.
This will put you in the Hostess Rewards Raffle at the end of the month!
Speaking of Hostess Winner, Congratulations to Joanne H
(this time for real, last month it was actually Joanne M) for being March’s Hostess Code Winner!!
Happy Shopping!


Retiring/Last Chance List!
The 2021–2022 Annual Catalog will be retiring soon! It’s always bittersweet to see a classic Stampin’ Up! catalog take a trip to retirement. But, we’re looking forward to all the new products on their way—and we hope you are, too!
Stock up on your favorite products before they’re gone for good! Save up to 50% on essential craft supplies. What are you waiting for? Start shopping! After all, this selection of Last Chance Products is only available while supplies last. 
The best way to see what is on the last chance list is by going right to the Stampin’ Up! shopping site and selecting the “last chance” section.


Waves of the Ocean
Early release item from the new catalog
Waves of the Ocean Collection, a must have!  Each of the world’s wide and open oceans is brimming with beauty and wonder. Marvelous marine animals, miles of submerged mountain ranges, and unique underwater plants lie thousands of feet below Earth’s dry surface, encouraging exploration and awaiting discovery.
Discover the depths of the ocean—and your artistic abilities—with the Waves of the Ocean Collection! This coastal collection includes an inspiring set of stamps and detailed dies, both early-release products from the upcoming 2022–2023 Annual Catalog. Plus, a pack of paper made from images of hand-poured paint, blue-hued foil sheets for a sea of shine, and radiant rhinestones for a splash of sparkle—each an exclusive product you can only purchase during the promotion period!
Explore artistic expression with the Waves of the Ocean Collection. With these seaside supplies, you’ll dive into inspiration and swim in a sea of creativity!

All Together
Early release item from the new catalog
Loving hands and heartfelt words are the best way to show you care. With hand designs that illustrate coming together in friendship and solidarity, the All Together Collection will help you create cardmaking and paper crafting projects that reflect the people you know and love. 
The All Together Collection includes early-release products from the 2022–2023 Annual Catalog—an exciting new range of natural Stampin’ Blends—and exclusive products you can’t get anywhere else! Come together to create projects inspired by you. 
 
 
 New Kit Added
ROBOT BUDDIES KIDS CARD KIT (159336  |  $23)
The latest addition to the Kits Collection by Stampin’ Up! is a fun one! With the Robot Buddies Kit, configure cards featuring cute robots and robot themed images that kids will love. Combine your bandwidth to craft this kit together for some offline fun with these awesome, friendship-themed robots!
Our kit selection changes frequently. To see what kits we have available, please check the online store.

Details:
  • Kit includes 9 card bases—3 each in 3 designs—and 9 envelopes
  • Includes sticker sheets and printed die-cuts to decorate with
  • Includes two Classic Stampin’ Ink Spots in Bermuda Bay and Pumpkin Pie
  • Finished card size: 5-1/2" x 4-1/4" (14 x 10.8 cm)
  • Coordinating colors: Balmy Blue, Bermuda Bay, Granny Apple Green, Night of Navy, Pumpkin Pie

Say what???  A NEW Catalog!
With a new catalog brings NEW In Colors…check out the new In Colors for 2022 - 2024!


April 10th - Last Call to sign up for Paper Pumpkin
April 10th is the last day to sign up for the Beyond the Horizon Paper Pumpkin Kit!
Growing through life can also mean growing pains. Whether they’re climbing their career ladder or moving out for the first time—change can be simultaneously thrilling and scary—but isn’t that what makes life beautiful? Because new beginnings, after all, are simply new adventures. Let your loved ones know you’ll be there to support them through all of life’s chapters! 
The Change is Beautiful kit contains enough supplies to create 9 stunning cards with a unique folding technique to commemorate moments of change. The designs are inspired by the natural cycles of change found in nature. 

Details:
  • Number of projects: 9 cards; 3 each of 3 designs; 9 envelopes
  • Change is Beautiful Photopolymer Stamp Set
  • Melon Mambo Classic Stampin’ Spot®
  • Printed card bases
  • Printed envelopes
  • Printed, shaped die cuts
  • Iridescent sea glass
  • Dimensionals
Watch the YouTube video here https://youtu.be/OS68TM89A4w

Card size: 4-1/4" x 5-1/2" (10.8 x 14 cm)
Coordinating Stampin’ Up! colors: Balmy Blue, Basic Black, Bermuda Bay, Crushed Curry, Evening Evergreen, Granny Apple Green, Melon Mambo
Sign up here!
 

BREAK TIME!
So although I am not retiring…I am taking a small break this month from classes.  This is a busy month filled with many family events, so it is just easier to take a small break.  
Don’t you worry none, my card classes will be back in May and I am planning some fun events for May and June.  I am hoping to welcome back May Day Celebration, along with my annual Catalog Release Party!  Sooo, stay tuned!
________________________________________________________________________________
Let me know what types of classes you are looking for!
This year I would love to expand my class offerings.  If you are looking for particular classes, please let me know.  Things I do have in mind are the following:
  • Christmas Cards every other month (great way to get them all done way before December)
  • Seasonal Sampler Class
  • Smash Books
  • Scrapbook Layouts
Another idea is to do more large group events.  What are your thoughts?  Would you love to do full day events or weekend events, or both?  Your input is greatly appreciated!
________________________________________________________________________________

Have a wonderful April, see you in class in May.  
Oh and I will be here so please reach out with any questions you may have.

Friday, March 25, 2022

Stampin Friends March 2022 Blog Hop - Monochromatic March!

 Welcome to Stampin Friends Blog Hop! It is Monochromatic March! If you are following along the hop, you have arrived from Teri’s’s blog. Be sure to read through my blog, comment below and continue to Melissa’s blog. If you get lost along the way, you can find a list of Blog Hoppers at the end of each Blog.

So the color I decided to use, I guess isn’t really a color, lol, I picked Black.  I’ve also went back to using card sketches so that I can create a card and not CASE a card.  I know there is nothing wrong in CASEing, but it feels good being creative!  Funny thing about this month’s card and project…absolutely NO stampin’ involved…say what???! 


MATERIALS NEEDED:

Basic Black Cardstock

Basic White Cardstock
Whisper White Ink
All Together  6" X 6” Designer Series Paper
Here For You Dies
Brick & Mortar 3D Embossing Folder
White 3/4” Frayed Ribbon
Classic Matte Dots
Pendant Kit

Today more than ever our friends, family and even strangers need to know we are here for them.  So I used this months Blog to showcase a gift set that can be given to someone going through a hard time.

The card is letting the receiver know, I am here for them.  The card sketch I used is
by Julie Tilman.  I thought this would be perfect to show off the different patterns of DSP found in the All Together 6”x6” pack, along with using the main focal piece of DSP, “pinky square”.  Here are some simple instructions.

  1. Card base is basic white cardstock, 8 1/2” x 5 1/2”, folded in half to become 4 1/4” x 5 1/2”.
  2. The first layer is 4” x 5 1/4” basic black yardstick which I dry embossed using the 3D folder Brick & Mortar.  I think dragged the whisper white ink pad across the top.  This left the white ink on the raised “bricks”.
  3. The second layer is a piece of White Frayed ribbon (4 3/4”) banner cut at both ends.
  4. I used two different DSP patterns from the All Together pack, the diamond pattern is 2 1/4” x 3 3/4” adhered to the card base with dimensionals vertically.  The next layer is the “pinky swear” pattern (3” x 2 1/2”).
  5. For my sentiment I used the die cut “here for you”.  I was so excited that this phrase, once die cut stays together!!  This makes adhering it super easy!
  6. Lastly, I added three white classic matte dots to the lower right hand corner.

To go along with the card, I created a simple piece of jewelry, a pendant necklace.  I think these pendant kits are just amazing.  You can customize and personalize these to suit anyone and any theme!  So, to let the person know I am here for them always, I created a pendant that they can wear.  The DSP I used is the “pinky swear” and my packaging was really easy to make.  To make the necklace holder, I layered a 3” x 3” piece of DSP on top of a piece of 3 1/4” x 3 1/4” of basic black cardstock.  I punched two 1/16” holes at the top about an inch in from either side and an half inch from the top.  Then I cut a slit from the top to the holes that I punched.  This will hold the necklace cord in place. Now, I can slip this into a jewelry bag or a small burlap bag.  How easy and awesome is this!

I hope you enjoyed my monochromatic March card and project!  Don’t forget, comments of any kind (well hopefully nice ones, lol) are greatly appreciated. When you are done here be sure to hop on over to Melissa’s Blog.
See you next month!

___________________________________________________________________

BASIC BLACK 8-1/2" X 11" CARDSTOCK (121045  |  $8.75)
WHITE 3/4" (1.9 CM) FRAYED RIBBON (158138  |  $7.50)
UNINKED STAMPIN’ PAD & WHISPER WHITE REFILL  (147277  |  $9.50)
BASIC WHITE CARDSTOCK (159276 | $9.75)
ALL TOGETHER 6" X 6" DSP (160039  |  $11.50)
HERE TOGETHER BUNDLE (160263  |  $48.50)
CLASSIC MATTE DOTS (158146  |  $7.00)
BRICK & MORTAR 3D EMBOSSING FOLDER (149643  |  $10.00)


Friday, February 25, 2022

Stampin Friends February 2022 Blog Hop - Fabulous Fun Folds & 3D Projects!


Welcome to another month of Stampin Friends Blog Hop! This month we are focusing on fun fold cards and 3D projects! If you are following along the hop, you have arrived from Jean’s blog. Be sure to read through my blog, comment below and continue to Melissa’s blog. If you get lost along the way, you can find a list of Blog Hoppers at the end of each Blog.


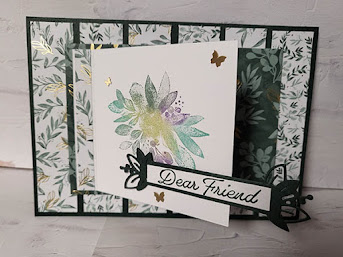
I thought I would challenge myself by combining the two and oh my word…I really love how it came out!  My fun fold card and 3D project includes the Pyramid Card by Kristeen Gill.  Full color instructions with pictures can be found on SplitcoastStampers.com.  I did tweak it a little, so my instructions are listed below.  And just an FYI, this you can also be made as two separate items.  Let’s get started, shall we.

MATERIALS NEEDED:

  • Evening Evergreen Cardstock and Ink
  • Soft Succulent Cardstock
  • Basic White Cardstock
  • Scraps of Basic White and Evening Evergreen Cardstock
  • Eden’s Garden DSP (I thought this was still available, so and DSP will work for this card)
  • Eden Die Set
  • Eden’s Garden Stamp Set
  • Brushed Brass Butterflies
  • Polished Dots

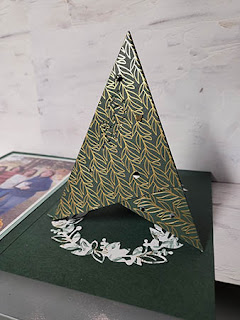
As I was making this project I decided to personalize it so I can give it as a gift after the blog hop goes live. So now it is a 3D luminaire, fun fold, scrapbook card. Enjoy.

The card itself is larger than a standard letter half  folded to 4 1/4” x 5 1/2”. This card 5”x7” folded.  It began as regular card but as I went along added some fun features.

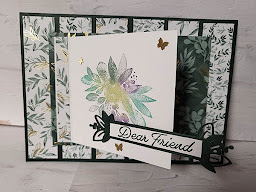
Card Front
Here are the measurements for the card:

  • Base: Evening Evergreen:10” x 7”: Scored at 5”.
  • First Layer: Eden’s Garden DSP - 6 pieces of 4 3/4” x 1” (two designs)
  • Second Layer: Eden’s Garden DSP - 1 piece of 5 1/4” x 3 3/4”
  • Third Layer: Basic White Cardstock 4” x 3 1/2” (scored at 3/8”); Eden’s Garden DSP - 1 piece go 3/8” x 3 1/2”
Instructions
  1. Fold the evening evergreen in half to create the card base.
  2. The first layer will be the 6 pieces of DSP adhered at equal distance between each piece.
  3. The second layer is the larger rectangle piece adhered to the center of the card front with dimensionals.
  4. I used a fun technique to add color to the larger floral stamp from Eden’s Garden stamp set.  Instead of just using one ink, I used sponge daubers to add a couple of colors to the stamp.  I then huffed on the stamp, to reactivate the ink and stamped!  I am pretty impressed as to how it came out.  This idea came from Anna Helman.
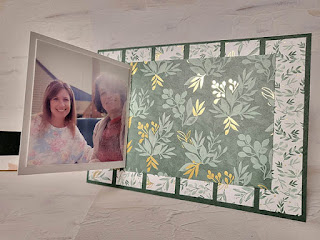
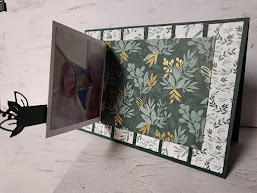
  5. Here comes the fun part, with the third layer, I scored the basic white cardstock at 3/8” and adhered just the flap to the third layer leaving an even margin at the top, bottom and left hand side.  This way it will flip open to reveal a hidden picture and a sentiment (which I have not added yet).  I then adhered the strip of DSP to the left hand side.
  6. Using scraps of evening evergreen die cut a banner from the Eden Die set. Adhered this to the flap with dimensionals.  My sentiment “Dear Friend” is stamped in evening evergreen ink onto a piece of basic white card stock measuring 3/8” x 2 3/4”.
  7. Lastly, I embellished the front with brushed brass butterflies and polished dots.

Card Inside & 3D Luminaire
Here are the measurements for the inside of the card:
  • Left side: Soft Succulent 4 1/4” x 6 1/4” (used for the picture mat)
  • Right side: Eden’s Garden DSP - 5 1/4” x 4”; 8” x 4”; 4” x 4”, tiny strip of matching DSP.

The left side of the inside card is pretty simple, I just matted a picture onto the soft succulent cardstock and adhered it with snail. 


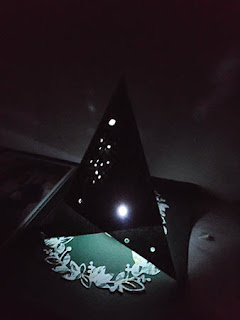
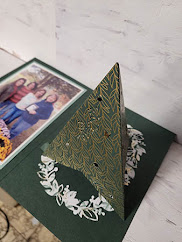
The right side is where the 3D project comes to life.  I used the pyramid card design to create my luminaire but the catch is, it stays attached in the card.  The recipient just folds it into a pyramid and it adheres together with a mini velcro circle.  Below are some simple instructions, but you can find more detailed instructions on the pyramid card on Splitcoaststampers under tutorials. My version uses one 8” x 4” and one 4” x 4” piece of DSP, versus 3 pieces of 3 3/4” pieces.

Instructions

  1. Score the 8” x 4” at 4”, then at a diagonal from the 4” score to the outside corner.  Do this on both sides going from the center.  Then, score the 4” x 4” on a diagonal.
  2. Next adhere the 4” square to the middle of the 8” x 4”, so the scored point lines up with the 4” score line.
  3. Then, I randomly punched holes on this DSP so light from an electric tea light will show through, once the pyramid is built.
  4. Fold all the score lines to create a three sided pyramid, one side will overlap, this is where I added the velcro.  Towards the corner.
  5. When the pyramid is folded up, there will be three points, at one of the points I scored a then strip of matching DSP. I adhered half to the inside of the card and the other half to the inside of the pyramid, be sure the score is not directly at the point.
  6. When you undo the velcro, the pyramid will fold down into almost a square, so the card is mailable.  The only catch is this should be mailed in a padded envelope if you are including the battery operated tea light.
  7. To cover up the small strip of DSP, I die cut the 5 1/4” x 4” DSP using the largest frame and adhered it to the left hand side of the card. 

These instructions seem very confusing, but hopefully the pictures will help.  If not feel free to ask any and all questions and I will try to explain it further.

I hope you enjoyed my Fun Fold, 3D project!  Don’t forget, comments of any kind (well hopefully nice ones, lol) are greatly appreciated. When you are done here be sure to hop on over to Melissa’s Blog.
See you next month!


______________________________________________________________________
Evening Evergreen Cardstock (155574 | $8.75) and Ink (155576 | $7.50)
Soft Succulent Cardstock (155776 | $8.75)
Basic White Cardstock (159276 | $9.75)
Eden’s Garden Stamp Set (157823 | $23.00)
Eden Dies (157831 | $35.00)
Brushed Brass Butterflies (158136 | $10.00)
Polished Dots (158134 | $7.50)