Friday, June 23, 2023

Stampin Friends June 2023 Blog Hop - Lots of Layers

Welcome to the Stampin Friends Blog Hop!


I spoke to soon last month…where is the warmth?? Here in New England our weekends have been gloomy and rainy, yuck!  It is almost July and I believe we hit 80 degrees just a hand full of times.  For someone who is ALWAYS cold this is NOT GOOD.  But if there is to be a brite side, it gives me more time to create, lol!

This month our card feature is all about layers…hey, I know about layers all too well, clothing and paper. Let’s get to my card now, shall we.  My idea came from a card sketch that Steph supplied us with during COVID.  I did use most of the sketches but found some I still need to try out.

If you are following along the hop, you have arrived from Steph’s blog. Be sure to read through my blog, comment below and continue to Maureen’s blog. If you get lost along the way, no worries, you can find a list of Blog Hoppers at the end of each Blog. ENJOY!


MATERIALS NEEDED


Stamp Set: Let’s Go Shopping

Paper:  

  • Basic White CS (5 ½” x 8 ¼”, scored at 4 ¼”; scraps) (card base)
  • Les Shoppes Designer Series Paper (DSP) (4” x 5 ¼”)
  • Les Shoppes DSP (1 ¾” x 5 ¼”)
  • Daffodil Delight CS 2- (3” x 2 ½”)
  • Les Shoppes DSP 2- (2 ¾” x 2 ¼”)

Ink:  Momento Black, Pecan Pie


Tools/Accessories:   Let’s Go Shopping Dies; Adhesive-Backed Solid Gems

INSTRUCTIONS

  1. Did someone say layers?? I am pretty sure I succeeded with the requirements…
  2. My card base is a 8 ½” x 5 ½” basic white CS, scored and folded down to a 4 ¼” x 5 ½”.
  3. My first layer is a piece of Les Shoppes DSP (everything used   is from the Les Shoppes Suite Collection).  This is adhered with snail.
  4. The second layer is the “banner” piece that measures 1 ¾” x 5 ¼’ cut from a piece of Les Shoppes DSP paper.  I adhered this to the left-hand side of the card base, leaving about a half inch to the left of the card.
  5. The third layer consists of another piece of DSP adhered to a piece of daffodil delight.  (the sketch works with squares but I made mine into rectangle due to the stamp set used).  I also added the small sign frame to this piece with the words Happy Birthday on it. 
  6. The fourth layer is similar to the previous one, but with this one I stamped the store front image and also added the food in the window.  This was colored using the Stampin’ Blends markers.  To give it added dimension I adhered the store front to the DSP with dimensionals.
  7.  Lastly, I used the Adhesive-backed solid gems to embellish the front.


I hope you enjoyed this month’s blog post and found a fun way to use up some of your DSP!!  Comments of any kind (well hopefully nice ones, lol) are greatly appreciated.  When you are done be sure to hop on over to the next blogger, Maureen on the list!

See you next month!


Friday, May 26, 2023

Stampin Friends May 2023 Blog Hop - Celebrating Men


Welcome to the Stampin Friends Blog Hop!

We are getting sooo close to the warmer months up here in New England.  It feels like it is taking forever!  But looking at the forecast for this weekend, it may be a time for my husband to take out his motorcycle.  This is our preferred choice of means to travel in the warmer months. 


OK, all this talk about motorcycles brings me to this month’s blog theme, celebrating men. One of the best ways I know how, is by making greeting cards with a motorcycle theme.  For this project I CASE’d two “moving” technique that Frenchie Stamps demonstrated a little while ago.  


If you are following along the hop, you have arrived from Steph’s blog. Be sure to read through my blog, comment below and continue to Barb’s blog.

If you get lost along the way, no worries, you can find a list of Blog Hoppers at the end of each Blog. ENJOY!


MATERIALS NEEDED

Stamp Set: Legendary Ride

Paper: Basic Grey CS (5 ½” x 8 ¼”, scored at 4 ¼”) (card base)

Basic White CS (4 ¼” x 2 ¼”; scraps)

Basic Black (4 3/8” x 2 3/8”)

Metallic Silver Specialty Paper (2 ½” x 5 ¼”)

Ready to Ride DSP (2 ½” x 5 ¼”)-retired but just HAD to use it.

Ink:  Momento Black

Tools/Accessories: Metal Plate 3D; Classic Matte Dots


MOTION TECHNIQUE 1: SMACKDOWN TECHNIQUE

  1. Ink the stamp in a color of your choosing.
  2. Stamp the image firmly onto card stock.
  3. Without reinking the stamp, move the stamp slightly and stamp again.
  4. Move stamp again, and without reinking, stamp another image.
  5. Continue until you run out of ink, or are pleased with the number of images. 


MOTION TECHNIQUE 2: STAMP DRAGGING

  1. Ink the stamp in a color of your choosing.
  2. Stamp the image at one edge of the card stock.
  3. After you stamp down, do not lift the stamp, drag it in the direction you want to motion to be.
  4. For the motorcycle because it is facing to the right. I stamped it at the right edge of the paper, I then dragged it towards the left.


Both of these techniques are fairly easy and can be used with most stamps!


INSTRUCTIONS

  1. First, I like to get my stamping out of the way, so all I need to do is assemble the card in the end.  Stamp your image using one of the two techniques above. Adhere this to the Basic Black CS and set aside.
  2. Stamp your sentiment in momento basic black ink and fussy cut around it.  Set this aside.
  3. Fold in half the card base and adhere the 5 ½” x 2 ½” Ready to Ride DSP to the card base front towards the bottom.
  4. Run the Silver Metallic Specialty Paper through the Stampin’ Cut and Emboss machine using the Metal Plate 3D.  Adhere these to the card base front towards the top.  It will overlap the DSP.
  5. Adhere the motorcycle panel to the metallic portion of the card using dimensionals.
  6. Then adhere the sentiment towards the bottom right-hand side of the card using mini deminsionals.
  7. Lastly, embellish with classic matte dots.

Who says card making needs to be hard.  With some simple techniques (like the ones above) you can make some amazingly, impressive cards!  I hope you enjoyed this month’s blog post!!  Comments of any kind (well hopefully nice ones, lol) are greatly appreciated.  When you are done be sure to hop on over to the next blogger, Barb on the list!

See you next month!


Friday, April 28, 2023

Stampin Friends April 2023 Blog Hop - All About the Flowers

Welcome to the Stampin Friends

Blog Hop!

April showers bring May flowers and that is what we are getting ready for today in our blog hop, all about flowers.

I would like to believe I have a green thumb but nope, not me.  The flowers that do survive are purposely planted for that.  They are low maintenance and come back every year.  I do have a fascination for daisies but am hesitant to plant any.  Usually when I plant a new flower, either the deer or chipmunks eat the seeds and or early greenery, grrr.  The only way to enjoy daisies is via crafting with stamps, lol, so that is what I choose for today’s Hop.

If you are following along the hop, you have arrived from Maureen’s blog. Be sure to read through my blog, comment below and continue to Barb’s blog.

If you get lost along the way, no worries, you can find a list of Blog Hoppers at the end of each Blog. ENJOY!


I know WE all have an incredibly huge inventory of floral stamp sets. So, my dilemma was do I use things that will retire or Brand Spanking NEW items from the new catalog??  I chose the first option because sadly I still have things that haven’t been used yet. 


MATERIALS NEEDED


Stamp Set: Nature’s Harvest & Flowering Tulips
Paper: Sweet Sorbet CS (5 ½” x 8 ¼”, scored at 4 ¼”; scraps)
Basic White CS (4 ¼” x 5 ½”; 1” x 2 5/8”; sceaps)
Basic Black (scraps)
Pretty Prints DSP (5 ½” x 4 ¼”)

Ink: Sweet Sorbet; Momento Black
Tools/Accessories: Harvest Dies; Meadow Dies; Deckled Rectangles Dies; Happy Labels Pick A Punch; Fern 3D Embossing Folder; Champagne Rhinestone Basic Jewels


  1. First, fold in half the card base and adhere the 5 ½” x 4 ¼” Pretty Prints DSP to the front.
  2. Die cut some of the silhouette images from the meadow dies in basic black cs adhere to the center of the card. Then die cut one image from the harvest dies set in sweet sorbet and adhere on top of the black pieces.
  3. Stamp the major flower image in sweet sorbet onto basic white cs and die but out.  Set this aside.
  4. Die cut a frame using the largest deckled rectangle die and the second size smaller that the largest one.  This will give it a thicker frame.  I then used the Fern 3D folder to give it some texture.  Adhere this frame to the center of the card with dimensionals.  NOTE: If there are any pieces hanging out of the frame, go ahead and trim those now.
  5. Next adhere the stamped flower image towards the left of the frame.  Be sure to
    have some of the flower piece overhang the frame.
  6. I then stamped the sentiment “Love You so much” on basic white cs with momento black ink. I made sure the piece I stamped on was 1” x 3”.  Next punch each end using the Happy Labels Pick A Punch.
  7. Lastly, I embellished the the card front with champagne basic rhinestones.
 

I really enjoyed putting this card together it can be used for just about any event. Actually for this card, it will be used as a Mother’s Day card.  She is truly my number one fan and has kept everything I have ever made and given to her!!!  I hope you enjoyed this month’s blog post!!  Comments of any kind (well hopefully nice ones, lol) are greatly appreciated.  When you are done be sure to hop on over to the next blogger, Barb on the list!

See you next month!


Friday, March 24, 2023

Stampin Friends March 2023 Blog Hop - Monochromatic March


Welcome to the Stampin Friends Blog Hop!

It’s March Madness and we are going mad over monochromatic card designs!

March’s theme is monochromatic, and I know I say this every year, but boy do I have a hard time with it.  However, this year I think I nailed it.  My color of choice is an In Color that will be discontinued in a few short months, so be sure to stock up on your favorites.

If you are following along the hop, you have arrived from Steph’s blog. Be sure to read through my blog, comment below and continue to Barb’s blog.

If you get lost along the way, no worries, you can find a list of Blog Hoppers at the end of each Blog. ENJOY!


Have you all seen this new technique? Some people call it Floating Element Technique while others call it Floating Stripe Technique.  No matter what you call it, it is so much fun to do and believe it or not VERY EASY!


MATERIALS NEEDED


Stamp Set: Silly Goose

Paper: Basic White CS (5 ½” x 8 ¼”, scored at 4 ¼”; 2 ¼” x 5”; scraps)

Fresh Freesia CS (5 ¼” x 4”; 2- ¾” x 4”)

Window Sheet 4” x 4”

Dandy Designs DSP (2 – ¾” x 4”; 1- 2” x 4 ¾”)

Ink: Fresh Freesia; Momento Black

Tools/Accessories: Circle Dies, 1 3/8” Circle Punch; Basic Pearls; Loose Flower Flourishes  

  1. First, fold in half the card base and adhere the 5 ¼” x 4” fresh freesia cs to the front.
  2. Adhere the 2” x 4 ¾” DSP onto the 2 ¼” x 5” basic white cs.  Adhere this to the card front with dimensionals towards the left-hand side.  Be sure there is equal spacing on the top, bottom and left-hand side.
  3. Adhere the strips of card stock and dsp onto the window sheet.  Leave equal distance between each strip.
  4. Die cut a circle out of the window sheet lined with the strips of card stock and dsp (On my card, the circle is 3 ¼”).  Adhere this to the card front with dimensionals.  Half the circle covers the strip while the other half adheres to fresh freesia cs.  Because one layer is higher than the other, I applied two layers of dimensionals to the side going on the fresh freesia cs.
  5. Next, I stamped the sentiment on basic white cs with momento black ink and punched it out with a 1 3/8” circle punch.  This gets adhered to the window frame circle.
  6. Lastly, I embellished the basic white circle with some basic pearls and loose flower flourishes.
  7. I also stamped the inside of the card with the first bumping geese.  I thought this was a nice touch to lift the spirit of the recipient of the card.


I really enjoyed putting this card together and can’t wait to showcase this in my next card class! It looks difficult but trust me, it was easy peasy!  I hope you enjoyed this month’s blog post!!  Comments of any kind (well hopefully nice ones, lol) are greatly appreciated.  When you are done be sure to hop on over to the next blogger, Barb on the list!

 See you next month!

______________________________________________________


_________________________________________________________________
 
Below are some of the products used:


Friday, February 24, 2023

Stampin Friends February 2023 Blog Hop - Fabulous Fun Fold & 3D Project


Welcome to the Stampin Friends Blog Hop!

Happy Valentines Day all!  I know it’s a bit late, but there is no time limit or day to say “I Love You” and I love you all for being here!

For February we decided to showcase some fun fancy fold cards and a 3D project.  My projects focus on St. Patrick’s Day.  I find this very comical, because with a name like mine (Tiziana Milano), there isn’t an ounce of Irish in me. But I love gnomes and thought this would be fun to do.

If you are following along the hop, you have arrived from Steph’s blog. Be sure to read through my blog, comment below and continue to Jo’s blog.

If you get lost along the way, no worries, you can find a list of Blog Hoppers at the end of each Blog. ENJOY! 


There are so many fun and fancy fold cards out there that is was very difficult to just choose one, but I finally did.  Today I will be showing you the fun fold technique called Latch Fold.  I had so much fun putting this together and even more fun creating the 3D project which can hold some gold nuggets!  In this case that means "Rolos"


MATERIALS NEEDED

Stamp Set: Celebrate Sunflowers, Lucky Clover

Paper: Granny Apple Green CS (5 ½”x6 ½”:card base, scored at 4 ¼” and 3 ½”x3 ¼” scored at 2 ¾” along the 3 ¼” side.)

Basic White CS (2”x 5 ¼”, 2 ½”x3 ¼” and 4”x5 ¼”, plus scraps)

Very Vanilla, Soft Suede, Smokey Slate and Dandy Designs DSP (scraps to make the gnome)

Mossy Meadow 5 ½”x8 ½”

Ink: Garden Green, Granny Apple Green, Grey, Parakeet Parade, Momento Black

Tools/Accessories: Gnome Dies, Curvy Keepsake Box Thinlits Dies (R), Clover Punch 

  1. First, I stamped the smaller sunflower image from Celebrate Sunflowers onto the 2 ½”x3 ¼” and 4”x5 ¼” basic white cs. I then stamped the band of clovers from Lucky Clover in parakeet parade to fill in the white space. Set the larger piece aside and adhere the smaller piece to the granny apple green cs, set this aside as well.
  2. I stamped the larger sunflower image on the 2”x 5 ¼” piece of basic white cs. Again, filling in the white space with band of clovers in parakeet parade. This is then adhered to the lefthand flap of the card base.
  3. Adhere the folded edge of the small granny apple green cs layer to the back side of the basic white cs (be sure it is secured to the right hand side), then adhere this to the inside of the card base.
  4. Die cut the gnome pieces in the colors shown in the image. Stamp the large clover in garden green ink, punch out and adhere to the gnome.  This all gets adhered with dimensionals onto the smaller flap.
  5. The last step I did, was stamp the sentiment inside the card. I stamped “Happy St. Patrick’s Day!” on a strip of basic white and adhered it to the left hand flap. I also stamped a few of the clovers from the stamp set.  I fussy cut them out and embellished the outside and inside of the card.
  6. The very last thing I did, is add whink of stella to the gnomes hat.
  

My 3D project cooridnates with the greeting card and can be filled with rolos chocolates to fit the theme.  I was surprised how easily this went together, although I do have to admit, I need to work on my cone making skills.


  1. The base is a curvy keepsake box using mossy meadow
    cs.
  2. The gnomes hat is a cone made out of Dandy Designs DSP and embellished with more clovers from Lucky Clover stamp set.   
  3. I then pieced together another gnome and adhered him to the keepsake box.
  4. There is nothing I dislike more than seeing people rip apart the treat holders I make just to get to the sweets, lol.  So what I did to preserve the box is I made an "arm" out of DSP connecting the hat to the keepsake box. Half of the "arm" is attached to the inside of the hat and the other half to the keepsake box.  This is place at the back of the box.  This way, they just need to flip up the hat to get at the chocolates.  

I hope you enjoyed this month’s project, I can’t to show you what I have in store next month!!  Comments of any kind (well hopefully nice ones, lol) are greatly appreciated.  When you are done be sure to hop on over to the next blogger on the list!

See you next month!

_____________________________________________________________ 
 
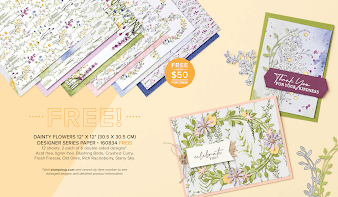
Here are some products used for my projects.  There are just a few days left to get your hands on the Dandy DSP.  This is a FREE Sale-A-Bration item when you spend $100 in Stampin' Up!'s catalogs. 
Here is February's Hostess Code: Z9YQ4MUX !!!
Be sure to use this code at check out or click this link to shop our website with my hostess code(https://www.stampinup.com?hostcode=PHJJB9KE). If your order is less than $150. This will put you in the Hostess Rewards Raffle at the end of the month!


Friday, January 27, 2023

Stampin Friends January 2023 Blog Hop - Life's Special Occasions


Welcome to the Stampin Friends

Blog Hop!

Happy NEW Year!!!!  Welcome all to 2023!!  How are your new year’s resolutions going??  I don’t “do” resolutions, but I do mentally tell myself every year I will not procrastinate on my projects like I have in the past.  Yeah, you see where I am going with this, lol. 


Any hoot let’s get to the real reason for this blog post…it’s time to get our Stampin’ on!  We are starting this year’s blog hop with “Life’s Celebrations”.  This is a perfect topic to start with because we all know there will be all types of Celebrations throughout the year.  With this post you will have endless ideas for all your Occasions!!

If you are following along the hop, you have arrived from Stephanie’s blog. Be sure to read through my blog, comment below and continue to Jo’s blog.

If you get lost along the way, no worries, you can find a list of Blog Hoppers at the end of each Blog. ENJOY!


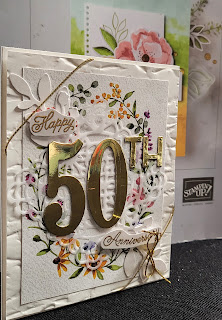
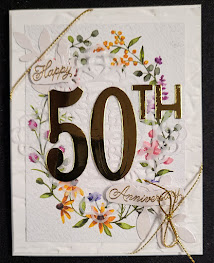
The Life’s Celebration I chose to focus on for this blog post is a 50th Anniversary!!  My Aunt and Uncle are celebrating 50 years of marriage this weekend and what a better way to present them their gift, than with a handmade greeting card.  Please accept my apologies in advance, I have used some retired products for this but the focus of the card does use NEW, beautiful designer series paper from Stampin’ Up!’s Sale-A-Bration Catalog.  I have been trying to be “good” by not buying EVERYTHING all at once from Stampin’ Up!’s new catalog.

MATERIALS NEEDED

Stamp Set: Always in my Heart (R)

Paper: Basic White CS (8 ½”x5 ½”, 4 1/8” x 5 3/8”); Shimmer White CS (scraps); Dainty Flowers DSP (Oval Image portion)

Ink: Versa Mark, Gold Embossing Powder

Tools/Accessories: Gold Simply Elegant twine, Square Vellum Dollies (R), Bough Punch, Old World 3D Embossing Folder (R), Large Numbers Dies (R)   

I tried my hand at lots of layering with different pieces.  I find these cards so impressive.  I think I did OK with it, but believe I still need to work on a few things.

  1. My card base is Basic white, I then layered another piece of basic white cardstock embossed with Old World 3D folder.
  2. On top of this I place the beautiful oval design of Dainty Flowers DSP. 
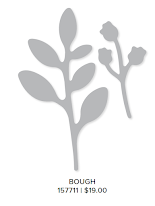
  3. For my next layer, I punched out some pieces using the Bough punch out of shimmer white paper, followed by a vellum dollie.
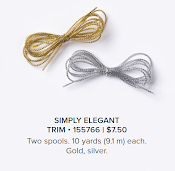
  4. Next , I used a piece of gold simply elegant twine around the edges of the card and finished it off with a small bow.
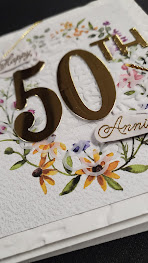
  5. The sentiment which is the cards focal point “Happy 50th Anniversary”, was using gold accents.  The 50 is die cut out of gold foil paper and the sentiment was made using gold embossing powder on shimmer white cardstock.


I hope you enjoyed my first project of year!  I am looking forward to sharing a lot more with you this coming year!!  Comments of any kind (well hopefully nice ones, lol) are greatly appreciated, of any kind and then when you are done be sure to hop on over to the next blogger on the list!


See you next month!


Blog Hop Index

__________________________________________________________________ 

Below are some of the products used in my card design.