Showing posts with label Simply Dainty. Show all posts

Friday, April 28, 2023

Stampin Friends April 2023 Blog Hop - All About the Flowers

Welcome to the Stampin Friends

Blog Hop!

April showers bring May flowers and that is what we are getting ready for today in our blog hop, all about flowers.

I would like to believe I have a green thumb but nope, not me.  The flowers that do survive are purposely planted for that.  They are low maintenance and come back every year.  I do have a fascination for daisies but am hesitant to plant any.  Usually when I plant a new flower, either the deer or chipmunks eat the seeds and or early greenery, grrr.  The only way to enjoy daisies is via crafting with stamps, lol, so that is what I choose for today’s Hop.

If you are following along the hop, you have arrived from Maureen’s blog. Be sure to read through my blog, comment below and continue to Barb’s blog.

If you get lost along the way, no worries, you can find a list of Blog Hoppers at the end of each Blog. ENJOY!


I know WE all have an incredibly huge inventory of floral stamp sets. So, my dilemma was do I use things that will retire or Brand Spanking NEW items from the new catalog??  I chose the first option because sadly I still have things that haven’t been used yet. 


MATERIALS NEEDED


Stamp Set: Nature’s Harvest & Flowering Tulips
Paper: Sweet Sorbet CS (5 ½” x 8 ¼”, scored at 4 ¼”; scraps)
Basic White CS (4 ¼” x 5 ½”; 1” x 2 5/8”; sceaps)
Basic Black (scraps)
Pretty Prints DSP (5 ½” x 4 ¼”)

Ink: Sweet Sorbet; Momento Black
Tools/Accessories: Harvest Dies; Meadow Dies; Deckled Rectangles Dies; Happy Labels Pick A Punch; Fern 3D Embossing Folder; Champagne Rhinestone Basic Jewels


  1. First, fold in half the card base and adhere the 5 ½” x 4 ¼” Pretty Prints DSP to the front.
  2. Die cut some of the silhouette images from the meadow dies in basic black cs adhere to the center of the card. Then die cut one image from the harvest dies set in sweet sorbet and adhere on top of the black pieces.
  3. Stamp the major flower image in sweet sorbet onto basic white cs and die but out.  Set this aside.
  4. Die cut a frame using the largest deckled rectangle die and the second size smaller that the largest one.  This will give it a thicker frame.  I then used the Fern 3D folder to give it some texture.  Adhere this frame to the center of the card with dimensionals.  NOTE: If there are any pieces hanging out of the frame, go ahead and trim those now.
  5. Next adhere the stamped flower image towards the left of the frame.  Be sure to
    have some of the flower piece overhang the frame.
  6. I then stamped the sentiment “Love You so much” on basic white cs with momento black ink. I made sure the piece I stamped on was 1” x 3”.  Next punch each end using the Happy Labels Pick A Punch.
  7. Lastly, I embellished the the card front with champagne basic rhinestones.
 

I really enjoyed putting this card together it can be used for just about any event. Actually for this card, it will be used as a Mother’s Day card.  She is truly my number one fan and has kept everything I have ever made and given to her!!!  I hope you enjoyed this month’s blog post!!  Comments of any kind (well hopefully nice ones, lol) are greatly appreciated.  When you are done be sure to hop on over to the next blogger, Barb on the list!

See you next month!


Friday, January 27, 2023

Stampin Friends January 2023 Blog Hop - Life's Special Occasions


Welcome to the Stampin Friends

Blog Hop!

Happy NEW Year!!!!  Welcome all to 2023!!  How are your new year’s resolutions going??  I don’t “do” resolutions, but I do mentally tell myself every year I will not procrastinate on my projects like I have in the past.  Yeah, you see where I am going with this, lol. 


Any hoot let’s get to the real reason for this blog post…it’s time to get our Stampin’ on!  We are starting this year’s blog hop with “Life’s Celebrations”.  This is a perfect topic to start with because we all know there will be all types of Celebrations throughout the year.  With this post you will have endless ideas for all your Occasions!!

If you are following along the hop, you have arrived from Stephanie’s blog. Be sure to read through my blog, comment below and continue to Jo’s blog.

If you get lost along the way, no worries, you can find a list of Blog Hoppers at the end of each Blog. ENJOY!


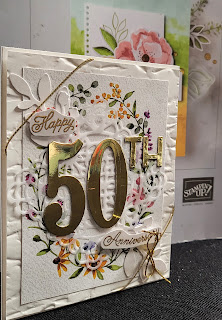
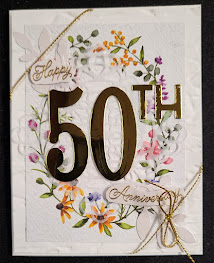
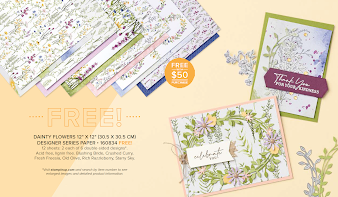
The Life’s Celebration I chose to focus on for this blog post is a 50th Anniversary!!  My Aunt and Uncle are celebrating 50 years of marriage this weekend and what a better way to present them their gift, than with a handmade greeting card.  Please accept my apologies in advance, I have used some retired products for this but the focus of the card does use NEW, beautiful designer series paper from Stampin’ Up!’s Sale-A-Bration Catalog.  I have been trying to be “good” by not buying EVERYTHING all at once from Stampin’ Up!’s new catalog.

MATERIALS NEEDED

Stamp Set: Always in my Heart (R)

Paper: Basic White CS (8 ½”x5 ½”, 4 1/8” x 5 3/8”); Shimmer White CS (scraps); Dainty Flowers DSP (Oval Image portion)

Ink: Versa Mark, Gold Embossing Powder

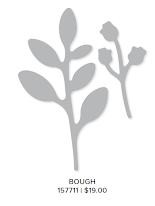
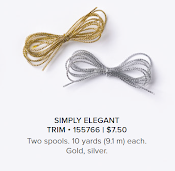
Tools/Accessories: Gold Simply Elegant twine, Square Vellum Dollies (R), Bough Punch, Old World 3D Embossing Folder (R), Large Numbers Dies (R)   

I tried my hand at lots of layering with different pieces.  I find these cards so impressive.  I think I did OK with it, but believe I still need to work on a few things.

  1. My card base is Basic white, I then layered another piece of basic white cardstock embossed with Old World 3D folder.
  2. On top of this I place the beautiful oval design of Dainty Flowers DSP. 
  3. For my next layer, I punched out some pieces using the Bough punch out of shimmer white paper, followed by a vellum dollie.
  4. Next , I used a piece of gold simply elegant twine around the edges of the card and finished it off with a small bow.
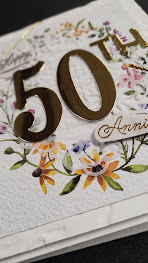
  5. The sentiment which is the cards focal point “Happy 50th Anniversary”, was using gold accents.  The 50 is die cut out of gold foil paper and the sentiment was made using gold embossing powder on shimmer white cardstock.


I hope you enjoyed my first project of year!  I am looking forward to sharing a lot more with you this coming year!!  Comments of any kind (well hopefully nice ones, lol) are greatly appreciated, of any kind and then when you are done be sure to hop on over to the next blogger on the list!


See you next month!


Blog Hop Index

__________________________________________________________________ 

Below are some of the products used in my card design.