Stampin Friends October 2022 Blog Hop - Thankful for You!
Welcome
to Stampin Friends Blog Hop! This month is we are creating for being "Thankful for You". First, I am thankful for all of you and happy I can share my creativity with you all! Second, I am thankful for all medical research facilities looking for cures! One in particular is the Leukemia & Lymphoma Society. I am raising much needed funds, so please be sure to visit my "other" page after the hop.
If
you are following along the hop, you have arrived from Jean’s blog. Be
sure to read through my blog, comment below and continue to Steph’s blog.
If you get lost along the way, you can find a list of Blog Hoppers at
the end of each Blog. ENJOY!
I know I said in previous posts, but I am still trying to make more masculine cards and gifts. So this month was no different! Shouldn't we be "Thankful" for our men in our lives? I also included one of my favorite things this month, pens. If you know me, you know I LOVE pens and kind of collect them. The one featured in the box I made was purchased this Summer in New Orleans! Now onto my items!
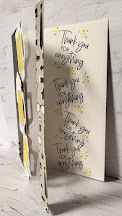
I found this fun card idea somewhere on Pinterest, please forgive for not knowing who it was. Since I found this, I have made sure to include in a class, for a birthday card and now this blog.
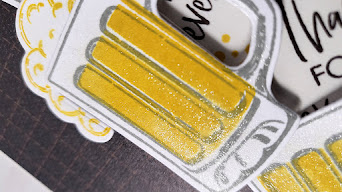
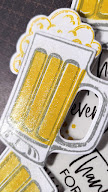
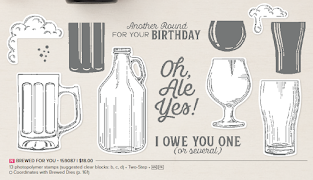
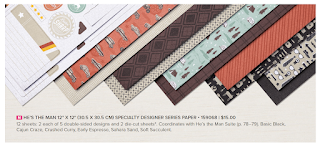
Products used: Brewed For You Bundle; Color & Contour; Very Vanilla Card Stock (CS); Basic White CS; Early Espresso, Slate & Crushed Curry Ink; Twine; Rustic Metallic Adhesive Backed Dots; He's the Man Designer Series Paper (DSP).
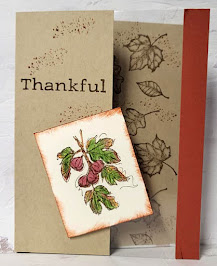
The card is a normal A2 (4 1/4" x 5 1/2") size, however you cut 2 inches off the front flap. Then you take a piece of 3" x 5 1/2" acetate to fill in where you cut away. Lastly, I added a border to the right edge of the acetate to finish off the "window". Inside the card I stamped my sentiment, but heck you can stamp anything you want to see through the window. Below is a card I created for one of my recent classes where we made Fall cards.It was a big hit!
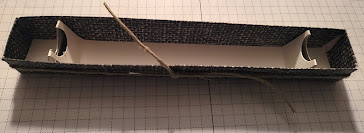
Now for the really fun part! We always seem to make cute packaging to hold sweets. Well this time I thought I would something to hold a "fancy" pen. Wouldn't you love to be gifted a nice pen? I know I would.
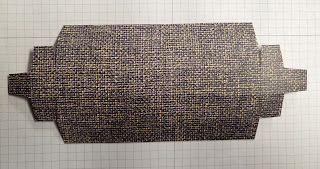
The bottom of the box is made with He's the Man DSP and cover (which is hard to see in the picture) is made with a piece of acetate. The finished box is 6" long, by 3/4" high and wide. I wanted a clear cover so the pen would be visible. The measurement for the base is 9" x 3 3/4". At the 9" side, score at 3/4", 1 1/2", 7 1/2" and 8 1/4". On the 3 3/4" side, score at 3/4", 1 1/2", 2 1/3" and 3". Then you will trim away the pieces as soon in the picture below.
I put the base together similar to the boxes Stampin' Up! often has up for sale or in their Paper Pumpkin kits. Mine did need a little adhesive. I didn't think to add a picture as to how it went together so I may update this post to include it over the weekend.
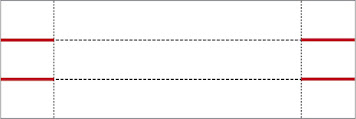
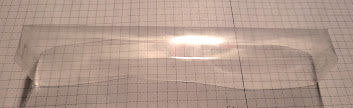
I'll admit, the acetate cover was not easy to put together, due to the fact you cannot see the score lines and it is super thick. The cover's measurement is 7 1/2" by 2 1/5". On the 7 1/2" side score at 13/16" on each end and 7/8" on each side of the 2 1/2". I did not cut away any pieces for the cover. All you need to do is on the 2 1/2" side, cut on the score lines to the score line going the other way.
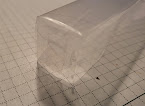
I ties some twine around the base so it really holds its shape and then the cover tucks nicely inside the box.
I also created an insert for the box the hold the pen. This piece is 3/4" x 8 1/4". I made some score lines and then punched out a three quarter circle at the peaks of the scores to create a cradle for the pen.
Here is the final box, along with a tag to go with it. I hope you enjoyed my “thankful for you” projects! Don’t forget,
comments of any kind (well hopefully nice ones, lol) are greatly
appreciated. When you are done here be sure to hop on over to Steph’s
Blog.
Oh wow.........love the pen, but your little box for it is extraordinary. Great project. Love the cards, I haven't seen anything like that before. Looks interesting and would love to find a tutorial on this card, if you have one. Cheers and thanks for sharing.
Here is the person that I CASE'd for this card, her name is Wendy Cranford and this is the link to her YouTube video. https://youtu.be/EOEIUmRsGMI. She learned the technique from Jennifer McGuire.


Very clever! I love new office supplies so a new pen is right up my alley!😉
ReplyDeleteGreat card and masculine presentation - love the pen box.
ReplyDeleteOh wow.........love the pen, but your little box for it is extraordinary. Great project. Love the cards, I haven't seen anything like that before. Looks interesting and would love to find a tutorial on this card, if you have one. Cheers and thanks for sharing.
ReplyDeleteHere is the person that I CASE'd for this card, her name is Wendy Cranford and this is the link to her YouTube video. https://youtu.be/EOEIUmRsGMI. She learned the technique from Jennifer McGuire.
DeleteLove the card!! Cute idea to be able to see the inside message through the "window.! What a great box!
ReplyDeleteLove your projects Tiziana!
ReplyDelete